Modern applications demand faster storage, quicker response times, and reliable data protection. Whether it is web hosting, virtualization, databases, gaming servers, or enterprise workloads, storage performance directly affects the overall server experience. This is why businesses increasingly prefer NVMe SSDs over traditional SATA drives.
However, using a single NVMe drive alone may not be enough for production environments. Hardware failures, storage corruption, or unexpected downtime can create major risks. This is where NVMe RAID on dedicated servers becomes important.
A properly configured NVMe RAID setup improves performance, increases redundancy, and helps maintain better uptime for critical applications. In this guide, we will explore how NVMe RAID works, the different RAID levels available, and how to configure RAID for NVMe SSDs on dedicated servers.
Understanding NVMe RAID
NVMe RAID refers to combining multiple NVMe SSDs into a single logical storage unit using RAID technology. RAID stands for “Redundant Array of Independent Disks.” The purpose of RAID is either to improve performance, increase storage redundancy, or achieve both together.
NVMe SSDs already provide significantly faster speeds compared to SATA SSDs and HDDs. When combined with RAID, businesses can achieve even greater storage efficiency and reliability.
A well-designed NVMe RAID configuration helps with:
- Faster read and write speeds
- Improved server responsiveness
- Better redundancy and fault tolerance
- Reduced risk of data loss
- Improved workload handling
- Better application performance
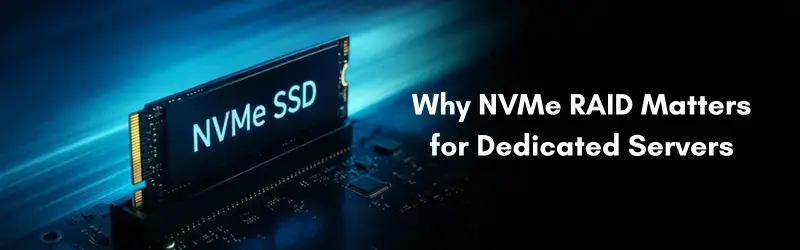
Why NVMe RAID Matters for Dedicated Servers
Dedicated servers commonly run resource-intensive applications such as:
- Virtual machines
- Databases
- Web hosting environments
- Streaming applications
- Backup systems
- Gaming servers
- Analytics platforms
These workloads constantly perform disk read and write operations. Without optimized storage infrastructure, applications may suffer from latency, slow loading times, or bottlenecks.
Configuring NVMe RAID on dedicated servers helps distribute storage operations efficiently while improving data reliability.
For example:
- RAID 0 focuses on performance
- RAID 1 focuses on redundancy
- RAID 10 combines both speed and redundancy
Common RAID Levels for NVMe SSDs
RAID 0 – Maximum Performance
RAID 0 splits data across multiple NVMe drives for faster performance.
Advantages:
- Extremely fast read/write speeds
- Better storage performance
- Full storage utilization
Disadvantages:
- No redundancy
- Failure of one drive causes complete data loss
RAID 0 is commonly used for:
- Temporary workloads
- Cache servers
- High-speed processing environments
RAID 1 – Data Redundancy
RAID 1 mirrors data between two NVMe SSDs.
Advantages:
- High data protection
- Better uptime
- Simple recovery process
Disadvantages:
- Only 50% usable storage
- Slightly higher storage cost
RAID 1 NVMe setups are ideal for:
- Business websites
- Databases
- Critical applications
- Hosting servers
RAID 5 – Balanced Storage Efficiency
RAID 5 uses striping with parity across multiple drives.
Advantages:
- Better storage utilization
- Redundancy support
- Good read performance
Disadvantages:
- Slower write performance
- Longer rebuild times
- Higher complexity
RAID 5 is more common in larger storage environments.
RAID 10 – Performance and Redundancy
RAID 10 combines RAID 0 and RAID 1 together.
Advantages:
- Excellent performance
- Strong redundancy
- Faster rebuild times
- High reliability
Disadvantages:
- Requires more drives
- Higher infrastructure cost
RAID 10 dedicated server environments are commonly used for:
- Virtualization
- Enterprise hosting
- High-traffic applications
- Financial platforms
- Database servers
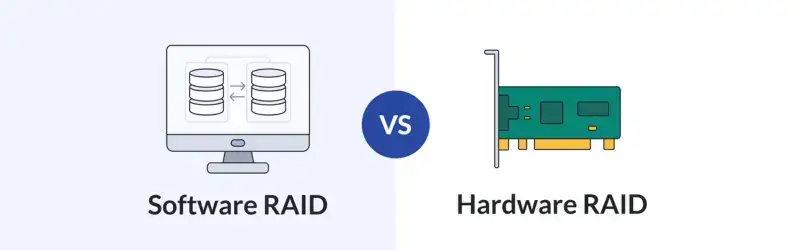
Hardware RAID vs Software RAID
When configuring NVMe RAID, businesses can choose between hardware RAID and software RAID.
Hardware RAID
Hardware RAID uses a dedicated RAID controller card.
Benefits:- Better performance optimization
- Lower CPU usage
- Dedicated RAID processing
- Higher cost
- Controller dependency
- Compatibility considerations
Software RAID
Software RAID is managed directly by the operating system.
Linux servers commonly use:
- mdadm
- ZFS
- LVM RAID
- Lower cost
- Easier flexibility
- Better transparency
- Slight CPU overhead
- OS dependency
Preparing for NVMe RAID Configuration
Before configuring RAID for NVMe SSDs, administrators should prepare the server environment carefully.
Verify Drive Compatibility
Ensure:
- NVMe SSDs are identical whenever possible
- Firmware versions are updated
- Drives are healthy
Backup Existing Data
RAID configuration often wipes existing drives.
Always:
- Create full backups
- Verify backup integrity
- Store backups separately
Select the Right RAID Level
Choose RAID based on workload goals:
| Workload Type | Recommended RAID |
|---|---|
| Maximum Speed | RAID 0 |
| Data Safety | RAID 1 |
| Balanced Enterprise Use | RAID 10 |
| Large Storage Arrays | RAID 5 |

How to Configure NVMe RAID on Linux Dedicated Servers
The exact process varies depending on operating system and server hardware. Here is a simplified overview using Linux software RAID with mdadm.
Step 1: Install RAID Tools
On Ubuntu or Debian systems:
apt install mdadm
On CentOS or AlmaLinux:
yum install mdadm
Step 2: Identify NVMe Drives
Use:
lsblk
This displays available NVMe devices.
Example:
- /dev/nvme0n1
- /dev/nvme1n1
Step 3: Create RAID Array
Example RAID 1 setup:
mdadm --create --verbose /dev/md0 --level=1 --raid-devices=2 /dev/nvme0n1 /dev/nvme1n1
This creates a mirrored RAID array.
Step 4: Verify RAID Status
Use:
cat /proc/mdstat
This shows synchronization progress and RAID health.
Step 5: Create Filesystem
Format the RAID array:
mkfs.ext4 /dev/md0
Step 6: Mount the RAID Array
Create mount point:
mkdir /storage
Mount array:
mount /dev/md0 /storage
Step 7: Save RAID Configuration
Save RAID settings:
mdadm --detail --scan >> /etc/mdadm/mdadm.conf
Monitoring NVMe RAID Health
RAID arrays should be monitored continuously.
Important monitoring areas include:
- Drive health
- RAID sync status
- SMART errors
- Temperature monitoring
- Disk failures
Common monitoring tools:
- smartctl
- mdadm monitoring
- Prometheus
- Zabbix

Best Practices for NVMe RAID Setup
Use Enterprise-Grade NVMe SSDs
Consumer SSDs may not handle heavy server workloads effectively.
Enterprise NVMe drives provide:
- Better endurance
- Stable performance
- Improved reliability
- Power-loss protection
Maintain Proper Cooling
NVMe drives generate significant heat under load.
Overheating can:
- Reduce performance
- Cause throttling
- Reduce SSD lifespan
Regularly Test Backups
RAID is not a backup solution.
RAID protects against drive failure but does not protect against:
- Accidental deletion
- Malware
- Corruption
- Ransomware
Monitor SSD Wear Levels
NVMe SSDs have finite write endurance.
Track:
- Drive lifespan
- Write cycles
- Health percentages
Common Mistakes to Avoid
Using RAID 0 for Critical Data
Many users choose RAID 0 purely for speed and later suffer complete data loss after a drive failure.
Ignoring Backup Planning
RAID improves availability but does not eliminate the need for backups.
Mixing Different SSD Models
Using different NVMe models can create:
- Uneven performance
- Compatibility issues
- Stability problems
Neglecting Monitoring
Without monitoring, administrators may not notice degraded RAID arrays until failures occur.
Conclusion
Configuring NVMe RAID on dedicated servers is one of the most effective ways to improve storage performance, server responsiveness, and infrastructure reliability. As modern workloads continue demanding faster storage and higher uptime, RAID-enabled NVMe environments have become increasingly important for businesses and hosting providers.
Choosing the right RAID level depends on whether the priority is speed, redundancy, or a balance of both. RAID 1 and RAID 10 are commonly preferred for production environments because they provide strong data protection while maintaining excellent performance.
With proper planning, monitoring, cooling, backups, and maintenance, an NVMe RAID configuration can deliver long-term stability and consistent performance for demanding applications.
Businesses investing in optimized dedicated server storage infrastructure are better prepared to handle future growth, increasing workloads, and modern application requirements efficiently.